Introduction
During our latest incident response case we have discovered a recent sample of Brute Ratel C4 packed with Themida. BRC4 is a powerful Command and Control (C2) tool which allows to control targeted workstations through an executable agent. The objective of Themida is to protect code against reverse engineering.
Currently, C2 tools are used by attackers as much as pentesters. So, it’s always interesting to analyse and to fully understand them in order to find a way to detect them effectively and enrich the threat hunting phase.
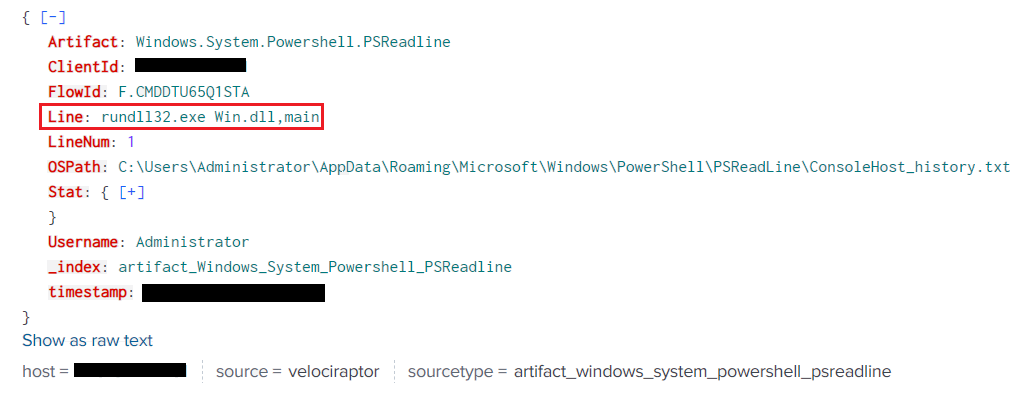
This sample is a DLL from an archive that has been brought to the targeted machine. It was executed with the command line present into the following event:
The difficulties behind this sample were:
• Unpack Themida
• Defeat obfuscations and anti-debug techniques
• Understand the different stages to reach configuration and data sent
Here you’ll find a short explanation of the different stages:

This article solely focuses on obfuscation techniques, configuration extraction and how data are encrypted before they are sent to the server.
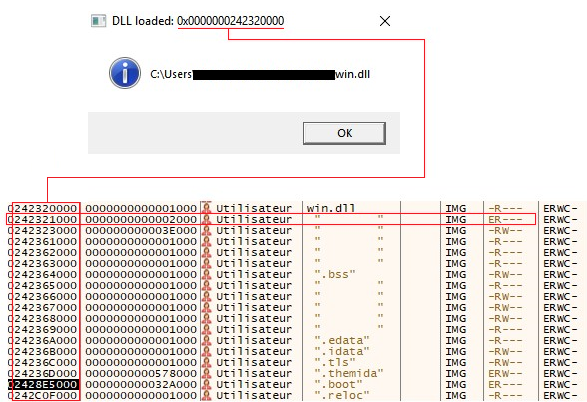
To briefly summarize, to pass the first stage, we used ScyllaHide plug-in on xDBG and we jumped in a specific area with read/execution rights at the time the DLL was loaded. In this area, we found symbols that allowed us to find the loader of BRC4.
The second stage is just a loader of shellcode where ZwAllocateVirtualMemory, ZwProtectVirtualMemory, ZwCreateThreadEx and NtWaitForSingleObject functions are used for self-injection. We save the shellcode with system informer to get a new starting point for the analysis.
The third stage focuses on the first part of the shellcode with obfuscations and anti-debug techniques. It introduces the last stage by self-injection with NtQueueApcThread.
The last stage is the most interesting part of the shellcode because it focuses on configuration and communication.
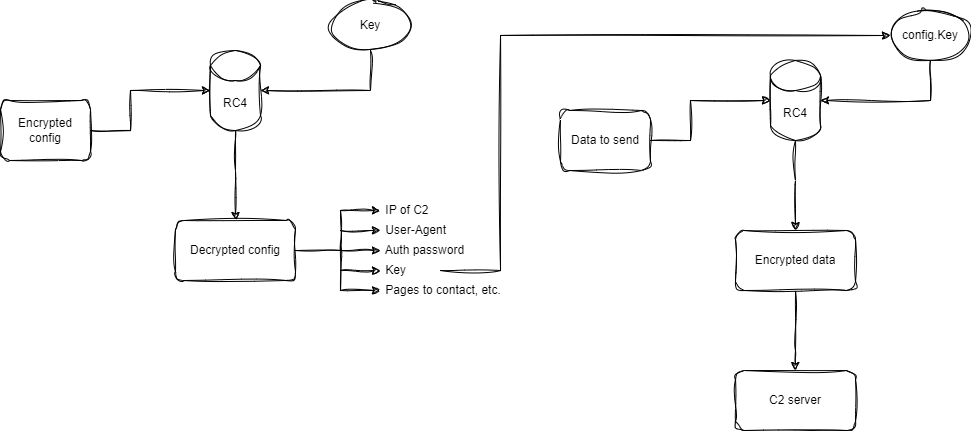
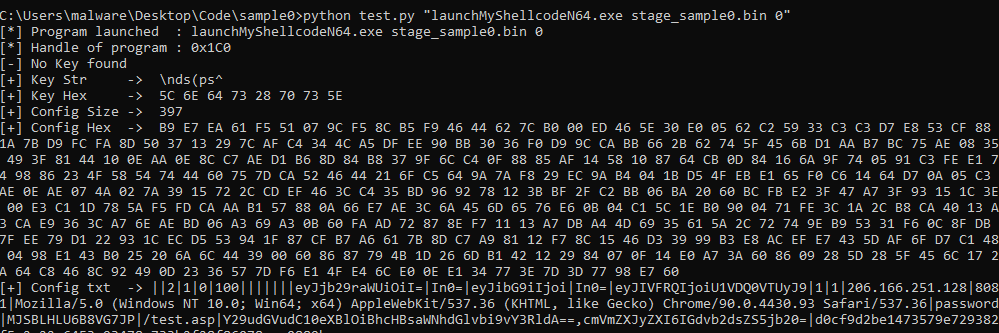
In the following article, I will use a first part to describe what obfuscation techniques were used in stages 2, 3 and 4 and unpacking process of Themida. I will then describe how stage 4 retrieves the configuration, uses it to cypher outgoing data, and how we can automate retrieval of this configuration.
Unpack of Themida
For the unpacking part we used ScyllaHide plug-in on x64DBG with Themida x86/x64 profile.
We found two different results for two types of execution: normal execution on the left and
execution with ScyllaHide on the right:
| Name |
Win.dll |
| SHA-256 |
4400750cbc597b7e0cec813dcaf66d00e83955a034591a5a6ba40547a045721b |
| File |
type PE64 |
| Packer |
Themida 3.x |
For the unpacking part we used ScyllaHide plug-in on x64DBG with Themida x86/x64 profile.
We found two different results for two types of execution: normal execution on the left and execution with ScyllaHide on the right:
After the execution with ScyllaHide plugin, we found a memory area with execution right and we jumped on it:
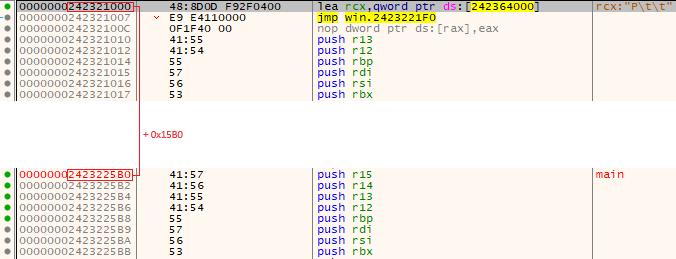
During the analysis of this memory area, we finally found a main function, this function is our second stage:
Obfuscation & Anti-debug
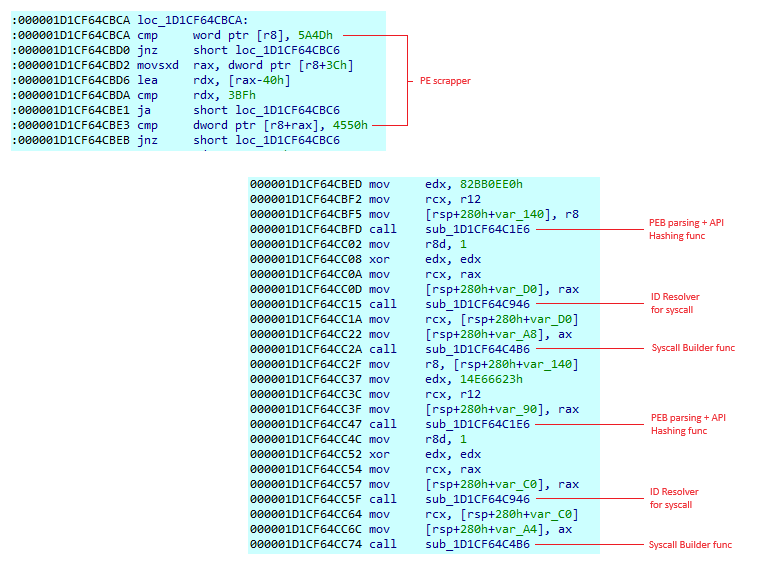
During our analysis we found obfuscations based on scraping, PEB parsing and API hashing on stage 2, 3 and 4.
Here, a part of code of stage 3:
We can find multiple functions, their role is:
- Introducing anti-debug techniques
- Load modules with PEB Parsing
- Load pointers of functions with PEB parsing and API hashing
- Build syscall routine
- Resolve syscall ID with scraping
Anti-debug
An anti-debug technique involving PEB parsing is used to compare the value at PEB+0xbc with 0x70. This code is encountered two times in the stage 3, it’s not evident to spot it, so we must analyse the code step by step.
Load modules with PEB Parsing
The pointer to the base address of each module is found with PEB parsing. In this case the program makes a loop in the _PEB_LDR_DATA structure to scrape these bytes: 0x5A4D. This technique is used to avoid calling direct functions such as LoadLibraryA which allows to load DLL.
Load pointers of functions with PEB parsing and API hashing
To resolve the pointers of the functions, the program parses the PEB structure and then makes a loop in the name pointer table in IMAGE_EXPORT_DIRECTORY structure. A call on the hashing function is operated for each name in the table to find the correct function for the requested hash. Once the correct function is found, its pointer is obtained using the address table. You’ll find an article describing the process in a more detailed way here.
Build syscall routine
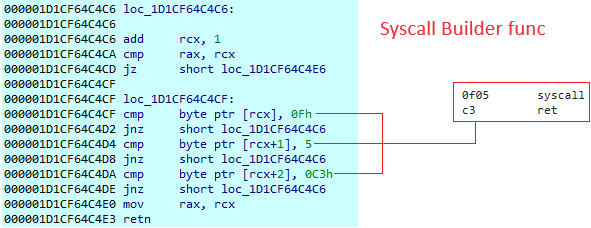
To be stealthier than its previous version, the program builds its own function to make a syscall. In an older version, there were obfuscation techniques for the loading function and ID resolution, but at the end there was a direct syscall advising us for an incoming self-injection.
In the capture below, the program builds a pointer to a custom code section to execute a syscall.
Resolve syscall ID with scraping
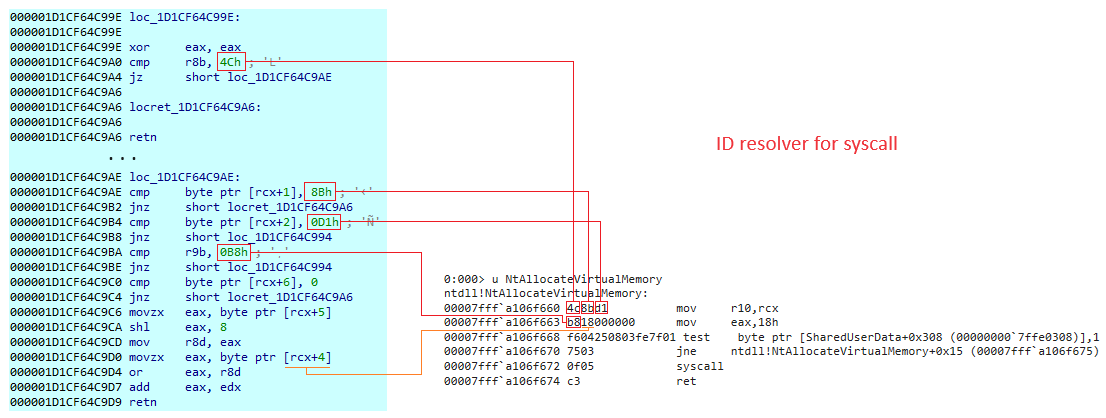
The code doesn’t use a direct syscall ID to be able to target enough workstations regardless of their version. The ID of a syscall depends on the version and build number of the Operating System: with this technique, it’s not necessary to obtain the OS version of the targeted workstations. All ID are presented on j00ru website. On the screen below, we can see the specific section which resolved a syscall ID. The code scrapes a specific sequence of bytes to find out the correct position of the ID. This process depends on the function previously loaded with PEB parsing & API hashing:
For a better understanding, on the screen above we have the function used to find syscall ID thanks to bytes sequence on the left. On the right, we have the code of NtAllocateVirtualMemory which allows us to understand why these following bytes are targeted: 0x4C, 0x8B, 0xD1 and 0xB8. The bytes 0x4C, 0x8B and 0xD1 are respectively:


